Get ready to elevate your culinary experience with these eight extraordinary fusion recipes that blend flavours from around the globe in the most unexpected ways.
From savoury dishes to delightful desserts, these recipes will inspire you to think outside the box and redefine your cooking style.
Whether you're hosting a dinner party or simply looking to spice up your weeknight meals, these fusion dishes promise to impress your taste buds and those of your guests!
Imagine sinking your teeth into a perfect taco shell crafted from crispy nori, brimming with fluffy sushi rice, fresh fish, and a zesty avocado cream. These Sushi Tacos are a delightful fusion of Japanese and Mexican cuisines, combining the freshness of sushi with the playful spirit of tacos.
Not only are these vibrant bites visually stunning, but they also burst with flavours that will have your taste buds dancing. They’re an ideal choice for a casual gathering or a fun family dinner. To elevate your sushi taco experience, make sure to use high-quality ingredients like sushi rice and high-quality soy sauce. Don't forget to grab some fresh seaweed sheets to ensure your taco shells are crispy and flavourful.
#### Ingredients:
- 4 sheets of nori - 1 cup sushi rice - 1 ¼ cups water - ½ lb sushi-grade fish (like tuna or salmon), diced - 1 avocado, mashed - 2 tablespoons lime juice - Salt and pepper to taste - 2 tablespoons soy sauce - Optional toppings: sliced radishes, sesame seeds, and green onions
#### Instructions:
1. Rinse the sushi rice under cold water until the water runs clear.
2. Combine the rice and water in a rice cooker or saucepan. Cook according to package instructions. Once cooked, let it cool slightly.
3. In a bowl, mix the mashed avocado with lime juice, salt, and pepper to create a zesty avocado cream.
4. Cut the nori sheets into halves or quarters to form taco shells.
5. Carefully shape the nori into taco shells by bending them slightly; you can use a taco holder to keep them upright.
6. Fill each nori shell with a spoonful of sushi rice, packing it lightly.
7. Add diced fish on top of the rice, drizzling with soy sauce.
8. Spoon a dollop of avocado cream on top of the fish.
9. Garnish with optional toppings like sliced radishes, sesame seeds, and green onions.
10. Serve immediately and enjoy these vibrant sushi tacos while they’re fresh!
Kimchi quesadillas offer a delightful and spicy spin on a beloved classic. The combination of the tangy, fiery flavours of kimchi with gooey melted cheese creates a mouth-watering dish that you’ll find hard to resist. Perfect for using up leftover kimchi, this recipe is a quick and flavourful meal option, making it ideal for busy weeknights or casual gatherings with friends.
Ingredients:
- 2 cups kimchi, chopped - 1 ½ cups shredded cheese (mozzarella or a blend of your choice) - 4 large flour tortillas - 1 tablespoon vegetable oil (or butter) - 2 green onions, finely chopped (optional) - Sour cream or guacamole, for serving (optional)
Instructions:
1. Start by heating a cast iron skillet over medium heat. Add a tablespoon of vegetable oil or butter to coat the bottom of the skillet.
2. Place one tortilla in the skillet and sprinkle half of the shredded cheese evenly across the surface.
3. Add the chopped kimchi on top of the cheese, spreading it out evenly.
4. Sprinkle the remaining cheese over the kimchi, then cover with another tortilla.
5. Cook for about 3-4 minutes, or until the bottom tortilla is golden brown and crispy.
6. Carefully flip the quesadilla using a spatula, and cook the other side for another 3-4 minutes until it’s golden brown and the cheese is melted.
7. Remove from the skillet and let it cool for a minute before slicing into wedges.
8. Garnish with chopped green onions if desired, and serve with sour cream or guacamole on the side.
Enjoy your kimchi quesadillas, a delightful fusion of flavours that will surely impress your friends and family!
Experience a delightful twist on traditional pasta with this Indian-Italian fusion recipe. The combination of garam masala and fresh vegetables transforms simple penne into a vibrant dish that bursts with flavour. This masala pasta is not only easy to prepare but also customizable, letting you incorporate your favourite ingredients for a personal touch. Perfect for any occasion, it’s a comforting meal that brings together the best of both culinary worlds.
This Thai curry pizza takes the traditional concept of pizza and infuses it with the rich, aromatic flavours of Thai cuisine. Imagine biting into a crispy crust topped with creamy coconut milk, vibrant mixed vegetables, and your choice of protein, all brought together with a zesty lime dressing. It's a delightful fusion that will impress your taste buds and elevate your pizza night to a whole new level.
The balance of sweet, spicy, and savoury flavours makes this dish a standout. Whether you’re hosting dinner guests or enjoying a cosy night in, this pizza is sure to be a hit.
Ingredients:
- 1 pre-made pizza dough (or homemade) - 1 cup coconut milk - 2 tablespoons red curry paste - 1 cup mixed vegetables (bell peppers, carrots, broccoli, etc.) - 1 cup cooked protein of choice (chicken, tofu, shrimp) - 1 tablespoon lime juice - Fresh basil leaves, for garnish - Lime wedges, for serving - Olive oil, for drizzling - Salt and pepper, to taste
Instructions:
1. Preheat your oven to 475°F (245°C) and place your pizza stone inside to heat up.
2. In a mixing bowl, combine the coconut milk and red curry paste. Whisk until smooth to create your sauce.
3. Roll out your pizza dough on a floured surface using a quality rolling pin until it reaches your desired thickness.
4. Carefully transfer the rolled-out dough onto a pizza peel or baking sheet.
5. Spread the coconut milk and red curry mixture evenly over the dough, leaving a small border around the edges.
6. Layer the mixed vegetables and cooked protein on top of the sauce.
7. Drizzle a little olive oil over the toppings and season with salt and pepper to taste.
8. Carefully slide the pizza onto the hot pizza stone in the oven. Bake for about 10-12 minutes, or until the crust is golden brown and crispy.
9. Once baked, remove the pizza from the oven and drizzle with lime juice.
10. Garnish with fresh basil leaves before slicing.
11. Serve hot with lime wedges on the side for an extra burst of flavour.
Enjoy this flavourful fusion creation that brings the essence of international cuisine right to your kitchen!
Mediterranean sushi rolls offer a delightful blend of sushi-making techniques infused with vibrant Mediterranean flavours. Picture fluffy sushi rice enveloped in crisp seaweed, filled with roasted red peppers, tangy feta cheese, and savoury black olives. To elevate the experience, finish with a drizzle of balsamic reduction, adding a sweet and tangy kick.
This refreshing twist on traditional sushi makes an excellent choice for appetizer platters or a light lunch, beautifully showcasing how culinary traditions from different cultures can harmoniously blend to create something truly unique.
For those interested in creating these flavourful rolls, don’t forget to grab a quality bamboo sushi mat to help you roll them perfectly. Additionally, using feta cheese and roasted red peppers can enhance the flavour profile further, making your Mediterranean sushi a standout dish. Enjoy this unique fusion as a light meal or an impressive appetizer!
Ingredients:
- 1 cup sushi rice - 1 ¼ cups water - 4 sheets nori (seaweed) - 1 medium roasted red pepper, sliced - ½ cup feta cheese, crumbled - ½ cup black olives, sliced - 2 tablespoons balsamic reduction - Sesame seeds (optional, for garnish) - Olive oil (for brushing)
Instructions:
1. Rinse the sushi rice under cold water until the water runs clear. This removes excess starch and prevents the rice from becoming too sticky.
2. In a saucepan, combine the rinsed rice and water. Bring to a boil over medium heat, then reduce to low, cover, and simmer for 20 minutes or until the rice is tender and the water is absorbed.
3. Once cooked, remove the rice from heat and let it sit covered for an additional 10 minutes. Fluff the rice with a fork and allow it to cool slightly.
4. Place a bamboo sushi mat on a flat surface and lay a sheet of nori on the mat, shiny side down.
5. With wet hands, spread a thin layer of sushi rice over the nori, leaving about an inch of space at the top edge. Press the rice down gently to ensure it sticks.
6. Arrange a line of sliced roasted red pepper, crumbled feta cheese, and black olives along the centre of the rice.
7. Starting from the bottom edge of the mat, carefully roll the sushi away from you, applying gentle pressure to keep the roll tight.
8. Once rolled, use a sharp knife to slice the sushi into bite-sized pieces. Wipe the knife with a damp cloth between cuts for cleaner slices.
9. Drizzle with balsamic reduction and sprinkle with sesame seeds if desired.
10. Serve immediately and enjoy your Mediterranean sushi rolls as a flavourful fusion dish!
If you're looking for a way to elevate your traditional Pad Thai, this spicy chorizo version is the answer. The smoky flavour of chorizo adds depth and richness, perfectly balancing the classic sweet and tangy sauce. This hearty dish is not only satisfying but also a fantastic way to spice up your weeknight dinners.
The combination of tender rice noodles, crunchy peanuts, and fresh herbs creates a delightful texture and a flavour explosion with every bite. It’s a guaranteed showstopper that will impress your family and friends alike.
Ingredients:
- 8 oz rice noodles - 6 oz chorizo, casing removed and crumbled - 2 tablespoons vegetable oil - 3 cloves garlic, minced - 2 eggs, lightly beaten - 1 cup bean sprouts - 1/2 cup peanuts, crushed - 1/4 cup green onions, chopped - 1/4 cup fresh cilantro, chopped - 3 tablespoons Pad Thai sauce - Lime wedges, for serving - Optional: chili flakes for extra heat
Instructions:
1. Cook the Rice Noodles: Begin by soaking the rice noodles in hot water for about 20-30 minutes or until they are soft. Drain and set aside.
2. Cook the Chorizo: In a large skillet over medium heat, add the crumbled chorizo. Cook until browned and crispy, about 5-7 minutes. Remove the chorizo from the skillet and set aside, leaving the drippings.
3. Sauté Garlic: In the same skillet, add the vegetable oil and garlic. Sauté for about 1 minute until fragrant.
4. Scramble the Eggs: Push the garlic to one side of the skillet and pour in the beaten eggs. Scramble until cooked through, then mix with the garlic.
5. Combine Ingredients: Add the soaked rice noodles, cooked chorizo, and Pad Thai sauce to the skillet. Toss everything together until well combined and heated through.
6. Add Fresh Ingredients: Stir in the bean sprouts, peanuts, green onions, and cilantro. Toss gently to combine.
7. Serve: Plate your spicy chorizo Pad Thai and garnish with additional peanuts, cilantro, and lime wedges. If you like it spicier, sprinkle with chili flakes.
Enjoy this bold twist on a classic dish that is sure to become a favourite in your home!
If you're looking for a dish that combines the best of both Greek and Japanese cuisines, this Greek Tzatziki Ramen is a must-try. The creamy tzatziki sauce made with Greek yogurt adds a refreshing twist to the warm, comforting ramen noodles. Topped with fresh cucumbers and tomatoes, this dish not only looks vibrant but also delivers a delightful contrast of textures and flavours.
Perfect for a light lunch or a unique dinner option, you can easily elevate this dish by adding grilled chicken or shrimp for extra protein.
#### Ingredients:
- 2 packs of ramen noodles - 1 cup Greek yogurt - 1 small cucumber, finely diced - 1 medium tomato, finely diced - 2 cloves garlic, minced - 1 tablespoon olive oil - 1 tablespoon lemon juice - 1 tablespoon fresh dill, chopped (or 1 teaspoon dried dill) - Salt and pepper, to taste
#### Instructions:
1. Cook the Ramen Noodles: Bring a pot of water to a boil. Add the ramen noodles and cook according to package instructions. Drain and set aside.
2. Prepare the Tzatziki Sauce: In a mixing bowl, combine the Greek yogurt, minced garlic, olive oil, lemon juice, chopped dill, salt, and pepper. Mix until smooth. For an extra refreshing effect, chill the tzatziki sauce in the refrigerator for about 30 minutes.
3. Assemble the Dish: Place the cooked ramen noodles in a serving bowl. Drizzle the chilled tzatziki sauce generously over the noodles.
4. Add Toppings: Sprinkle the diced cucumber and tomato on top of the noodles and tzatziki sauce for added freshness and crunch.
5. Optional Protein: If desired, grill chicken or shrimp seasoned with salt and pepper, and add it on top for extra protein.
6. Serve: Enjoy your Greek Tzatziki Ramen warm, garnished with additional fresh dill if desired.
This delightful fusion recipe is sure to impress and become a favourite in your culinary repertoire!
End your culinary fusion journey on a sweet note with a dessert that is both surprising and delightful: Chocolate Chai Mousse. This luxurious treat marries the rich flavours of high-quality dark chocolate with the warm spices of chai tea, making it a perfect indulgence for any occasion.
Not only is this dessert delicious, but it is also impressively simple to prepare. With just a few ingredients, including heavy cream and sugar, you can wow your guests without spending hours in the kitchen.
### Ingredients:
- 6 oz high-quality dark chocolate, chopped - 1 cup heavy cream - 1/4 cup sugar - 1/2 cup brewed chai tea, cooled - 1 teaspoon vanilla extract - A pinch of chai spice for garnish
### Instructions:
1. Melt the Chocolate: In a heatproof bowl, melt the dark chocolate over a pot of simmering water, stirring until smooth. Remove from heat and let it cool slightly.
2. Whip the Cream: In a mixing bowl, whip the heavy cream and sugar together until soft peaks form. Be careful not to overwhip.
3. Combine: Gently fold the cooled chai tea and vanilla extract into the melted chocolate until well combined.
4. Incorporate the Cream: Carefully fold the whipped cream into the chocolate mixture in three additions, ensuring not to deflate the mixture.
5. Chill: Spoon the mousse into serving dishes and refrigerate for at least 2 hours to set.
6. Serve: Before serving, sprinkle a pinch of chai spice on top for an elegant finish.
Treat yourself and your guests to a chilled dessert garnished with a sprinkle of chai spice, and enjoy the blissful fusion of flavours!
These eight fusion recipes are just the beginning of a culinary adventure that blends flavours, cultures, and techniques in deliciously unexpected ways.
By embracing fusion cuisine, you open your kitchen to a world of creativity and flavour that will keep your cooking fresh and exciting.
So gather your ingredients, get inspired, and start cooking these epic dishes that will surely impress family and friends!
Note: We aim to provide accurate product links, but some may occasionally expire or become unavailable. If this happens, please search directly on Amazon for the product or a suitable alternative.
This post contains Amazon affiliate links, meaning I may earn a small commission if you purchase through my links, at no extra cost to you.
Elevate your next gathering with these 12 unexpected appetizers that are sure to impress your guests.
From unique flavor combinations to visually stunning presentations, these recipes break the mold of traditional starters.
Get ready to delight your taste buds and spark conversation with these easy yet extraordinary dishes that will leave everyone clamoring for the recipe!
These refreshing watermelon and feta bites are the perfect combination of sweet and salty, guaranteed to impress your guests. Juicy watermelon cubes, topped with creamy feta cheese and a drizzle of [balsamic reduction](https://www.amazon.com/dp/B0BM123NCH?tag=4bsnet-21), create a delightful flavor profile that surprises and intrigues.
Not only do these bites taste amazing, but their vibrant colors make them a visually stunning addition to your appetizer spread. To make the assembly easier, consider using [mini skewers](https://www.amazon.com/dp/B08VN3ZP7J?tag=4bsnet-21) for a neat presentation. For added freshness, don't forget to garnish with [fresh mint](https://www.amazon.com/dp/B076HGCJDD?tag=4bsnet-21). If you're looking to prepare your watermelon with ease, a [watermelon slicer](https://www.amazon.com/dp/B0D6B8L2SC?tag=4bsnet-21) can make cutting the fruit into perfect cubes a breeze.
### Ingredients
- 1 small watermelon - 8 oz feta cheese, crumbled - ¼ cup balsamic reduction - Fresh mint leaves, for garnish - Mini skewers (optional)
### Instructions
1. Start by cutting the watermelon into 1-inch cubes. If you have a watermelon slicer, this will make the task easier and more efficient.
2. Take your crumbled feta cheese and set it aside in a small bowl.
3. On each mini skewer (if using), thread a watermelon cube followed by a generous amount of feta cheese.
4. Repeat the process until all the watermelon and feta are used, arranging them neatly on a serving platter.
5. Drizzle the balsamic reduction over the assembled bites, ensuring each piece gets a touch of that sweet tanginess.
6. Finally, garnish with fresh mint leaves for an added touch of elegance and freshness.
Serve these unexpected appetizers at your next gathering, and watch your guests marvel at the unique flavors and beautiful presentation!
2. Spicy Avocado Deviled Eggs
2. Spicy Avocado Deviled Eggs
Deviled eggs receive an exciting and spicy makeover with the addition of creamy avocado and a dash of Sriracha, making them a standout appetizer for any gathering. These delightful bites are not only simple to prepare but also burst with flavor, elevating them beyond the classic deviled egg. The vibrant green filling, beautifully piped into halved egg whites, is as visually appealing as it is delicious.
For an extra touch, consider serving your creations on a stylish deviled egg tray to impress your guests. Don't forget to use the best ingredients, like your favorite Sriracha sauce for that perfect kick!
Ingredients:
- 6 large eggs
- 1 ripe avocado
- 1 tablespoon mayonnaise
- 1 tablespoon Sriracha sauce (or to taste)
- 1 teaspoon lime juice
- Salt and pepper to taste
- Optional: Chopped cilantro or green onions for garnish
Instructions:
1. Boil the Eggs: Place the eggs in a saucepan and cover them with water. Bring to a boil over medium-high heat. Once boiling, cover the pan, remove it from heat, and let it sit for 12-15 minutes.
2. Cool the Eggs: After the time is up, transfer the eggs to an ice bath to cool for about 5 minutes. This will make peeling easier.
3. Peel and Halve: Once cooled, gently tap each egg on the counter to crack the shell, then peel under running water. Cut each egg in half lengthwise and carefully remove the yolks.
4. Make the Filling: In a mixing bowl, combine the egg yolks, avocado, mayonnaise, Sriracha sauce, lime juice, salt, and pepper. Mash until smooth and creamy.
5. Pipe the Filling: Transfer the mixture to a piping bag or a resealable plastic bag with the corner snipped off. Pipe the filling into the egg white halves.
6. Garnish: Sprinkle with chopped cilantro or green onions if desired for an added pop of color and flavor.
7. Serve: Arrange on a deviled egg tray and enjoy these spicy avocado deviled eggs at your next event, watching them disappear!
3. Caprese Salad Skewers
### 3. Caprese Salad Skewers
These Caprese salad skewers provide a refreshing and sophisticated take on a beloved classic. Layered with juicy cherry tomatoes, creamy fresh mozzarella balls, and aromatic basil leaves, these skewers are enhanced with a drizzle of olive oil and a rich balsamic glaze, delivering an explosion of flavors with each bite. Not only are they a joy to eat, but they also bring a vibrant, gourmet flair to your appetizer spread.
Ingredients: - 1 pint cherry tomatoes - 1 pound fresh mozzarella balls - Fresh basil leaves - Olive oil for drizzling - Balsamic glaze for drizzling - Salt and pepper to taste
Instructions: 1. On a skewer, thread a cherry tomato, a basil leaf, and a mozzarella ball. 2. Repeat until all ingredients are used. 3. Drizzle with olive oil and balsamic glaze, then sprinkle with salt and pepper.
Tips: - Opt for colorful cherry tomatoes for a more eye-catching presentation. - Assemble these skewers right before serving to maintain their freshness.
Frequently Asked Questions: 1. Can I use regular mozzarella? Yes, just cut it into bite-sized pieces. 2. How do I store leftovers? Keep them in an airtight container in the fridge.
For those who love gardening, consider growing your own herbs with fresh basil plants for a truly homegrown flavor!
4. Stuffed Mini Peppers
These vibrant stuffed mini peppers are a feast for the eyes and the palate, making them an irresistible addition to any appetizer spread.
Filled with a luscious creamy cheese mixture and garnished with fresh herbs, these delightful bites are the perfect finger food that your guests will rave about.
The sweet crunch of the mini sweet peppers, which you can conveniently find [here](https://www.amazon.com/dp/B086WWPJ86?tag=4bsnet-21), pairs beautifully with the rich filling, creating a satisfying taste experience that’s both unique and delicious.
For baking, a quality [baking dish](https://www.amazon.com/dp/B087QZQX8V?tag=4bsnet-21) is essential to ensure even cooking, while a reliable [cheese grater](https://www.amazon.com/dp/B0CLB61K3H?tag=4bsnet-21) makes preparing your cheese mixture a breeze.
Serve these warm or at room temperature for a delightful appetizer that will surely wow your guests!
### Ingredients:
- 12 mini sweet peppers - 8 oz cream cheese, softened - 1 cup shredded cheddar cheese - 1/2 cup crumbled feta cheese - 1/4 cup fresh herbs (such as parsley, chives, or dill), chopped - 1 clove garlic, minced - 1/2 tsp salt - 1/4 tsp black pepper - 1/4 tsp crushed red pepper flakes (optional for a bit of heat)
### Instructions:
1. Preheat your oven to 375°F (190°C).
2. Wash the mini sweet peppers and slice them in half lengthwise. Remove the seeds and membranes to create a hollow space for the filling.
3. In a mixing bowl, combine the softened cream cheese, shredded cheddar cheese, crumbled feta, chopped herbs, minced garlic, salt, black pepper, and crushed red pepper flakes (if using). Mix until well blended and creamy.
4. Spoon the cheese mixture into each halved pepper, filling them generously.
5. Arrange the stuffed peppers in a greased baking dish, placing them cut-side up.
6. Bake in the preheated oven for 20-25 minutes, or until the peppers are tender and the cheese is bubbly and slightly golden.
7. Remove from the oven and let cool slightly before serving.
8. Garnish with additional fresh herbs if desired and enjoy these easy, unique flavors that are sure to impress!
5. Sweet Potato Bites with Avocado Cream
These delightful sweet potato bites, topped with a luscious avocado cream, are sure to impress your guests with both their flavor and visual appeal.
The base of roasted sweet potato rounds, made from sweet potatoes, provides a hearty foundation, while a creamy avocado topping created from the freshest avocado and zesty lime juice elevates the dish with a refreshing twist that will surely surprise everyone at your gathering.
This gluten-free appetizer is not only a feast for the taste buds but also a treat for the eyes, especially when garnished with microgreens for an extra pop of color and texture.
To make the preparation even easier, consider using a lime juicer for perfectly squeezed juice, and ensure you have a reliable baking sheet for roasting your sweet potatoes to perfection. Enjoy this delicious dish that beautifully showcases unique flavors!
Ingredients:
- 2 large sweet potatoes, sliced into 1/2-inch rounds - 2 tablespoons olive oil - Salt and pepper, to taste - 2 ripe avocados - Juice of 1 lime - 1 clove garlic, minced - 1/4 teaspoon cumin (optional) - Microgreens or fresh herbs for garnish
Instructions:
1. Preheat your oven to 425°F (220°C).
2. In a large bowl, toss the sweet potato rounds with olive oil, salt, and pepper until evenly coated.
3. Spread the sweet potato rounds in a single layer on a baking sheet. Roast in the preheated oven for about 25-30 minutes, flipping halfway through, until they are tender and slightly caramelized.
4. While the sweet potatoes are roasting, prepare the avocado cream. In a medium bowl, mash the avocados, then add lime juice, minced garlic, cumin (if using), and a pinch of salt. Mix until smooth and creamy.
5. Once the sweet potato rounds are done roasting, let them cool slightly before topping each with a generous dollop of avocado cream.
6. Garnish with microgreens or fresh herbs for an added touch.
7. Serve immediately and watch your guests enjoy this unique, easy-to-make appetizer!
6. Mini Quiches with Unique Fillings
Mini quiches are a delightful and versatile appetizer that can be customized with a range of ingredients to cater to any taste preference.
Start by using a high-quality puff pastry for a flaky and delicious crust that will impress your guests. These bite-sized treats can be filled with an array of ingredients, from classic combinations like spinach and feta to more adventurous choices such as smoked salmon and dill.
Perfect for any occasion, these mini quiches add a touch of sophistication while remaining easy to handle and consume.
To make the preparation even simpler, consider using a reliable muffin tin for uniform shapes, and for effortless cleanup, silicone baking mats like these silicone baking mats can be a game changer.
Don’t forget to whisk your egg mixture with a sturdy whisk for the best texture. Your guests will be wowed by the unique flavors and elegant presentation of these mini quiches!
Ingredients:
- 1 package of puff pastry (thawed) - 4 large eggs - 1 cup heavy cream - Salt and pepper to taste - 1 cup shredded cheese (cheddar, feta, or your choice) - 1 cup chopped vegetables (spinach, bell peppers, mushrooms, etc.) - Optional: cooked meats (bacon, ham, or smoked salmon) - Fresh herbs for garnish (dill, chives, or parsley)
Instructions:
1. Preheat your oven to 375°F (190°C).
2. Roll out the puff pastry on a lightly floured surface and cut it into circles that fit into your muffin tin cups.
3. Press the pastry circles into the muffin tin, ensuring they cover the bottom and sides.
4. In a mixing bowl, whisk together the eggs, heavy cream, salt, and pepper until well combined.
5. Distribute the chopped vegetables and optional meats evenly into each pastry shell.
6. Pour the egg mixture over the fillings, filling each shell about three-quarters full.
7. Sprinkle your chosen cheese on top of each quiche.
8. Bake in the preheated oven for 20-25 minutes or until the tops are golden brown and the egg is set.
9. Allow to cool for a few minutes before gently removing from the muffin tin.
10. Garnish with fresh herbs and serve warm or at room temperature.
These mini quiches are sure to impress with their easy preparation and unique flavors, making them a standout choice among unexpected appetizers!
7. Bruschetta with Unique Toppings
Bruschetta is a delightful appetizer that can surprise your guests with its variety of toppings. Instead of the traditional tomato mix, consider combinations like pear and blue cheese or fig and prosciutto. These unique flavors bring a fresh twist to a classic dish, making it a standout on any appetizer platter.
To start, gather your ingredients and tools for a smooth preparation.
Ingredients:
- 1 French baguette or ciabatta loaf - 2 ripe pears, thinly sliced - 4 oz blue cheese, crumbled - 4 oz prosciutto, thinly sliced - 1 cup fresh figs, quartered - 1/2 cup balsamic glaze - 1/4 cup high-quality olive oil - Fresh herbs (such as basil or thyme) for garnish - Salt and pepper to taste
Instructions:
1. Preheat your oven to 400°F (200°C).
2. Slice the baguette into 1/2-inch thick slices using a baguette slicer for even pieces.
3. Arrange the slices on a baking sheet and drizzle with olive oil.
4. Toast the bread in the oven for about 5-7 minutes, or until golden brown and crispy.
5. For the pear and blue cheese topping, layer the sliced pears on top of the toasted bread, sprinkle with crumbled blue cheese, and finish with a drizzle of balsamic glaze.
6. For the fig and prosciutto option, place a few fig quarters on the toasted bread, add a slice of prosciutto, and drizzle with olive oil. Season with salt and pepper to taste.
7. Garnish both variations with fresh herbs for an extra touch of flavor and presentation.
8. Serve immediately and enjoy the delightful reactions from your guests as they savor these unexpected appetizers!
8. Savory Palmiers with Unique Fillings
Savory palmiers are a delightful and sophisticated appetizer that can be filled with a wide range of delicious ingredients. Using puff pastry, these elegant scrolls can be customized with fillings such as pesto and cheese or sun-dried tomatoes and olives, making them an unexpected culinary treat for your guests.
They are not only easy to prepare but also guaranteed to impress at any gathering!
Ingredients:
- 1 sheet of puff pastry (thawed if frozen) - ½ cup pesto (store-bought or homemade) - 1 cup grated cheese (such as mozzarella or Parmesan) - ½ cup sun-dried tomatoes (finely chopped) - ½ cup black olives (sliced) - 1 egg (beaten, for egg wash) - Salt and pepper to taste - Optional: herbs (like fresh basil or oregano) for added flavor
Instructions:
1. Preheat your oven to 400°F (200°C) and line a baking sheet with parchment paper.
2. Roll out the puff pastry sheet on a lightly floured surface to smooth out creases.
3. Spread an even layer of pesto over the entire surface of the puff pastry.
4. Evenly sprinkle the grated cheese over the pesto, then layer on the sun-dried tomatoes and sliced olives.
5. Season with salt, pepper, and optional herbs to enhance the flavors.
6. Starting from one edge, carefully roll the pastry sheet tightly into a log shape.
7. Once rolled, slice the log into ½-inch thick pieces and arrange them on the prepared baking sheet.
8. Brush the tops of the palmiers with the beaten egg to give them a golden finish.
9. Bake in the preheated oven for 15-20 minutes, or until puffed and golden brown.
10. Remove from the oven and let them cool slightly before serving.
Serve these warm for the best flavor and feel free to experiment with different fillings to cater to your guests' tastes!
9. Stuffed Mushrooms with Unique Fillings
Stuffed mushrooms are an all-time favorite appetizer that can easily be elevated with creative and unique fillings.
For an unforgettable experience, consider stuffing them with a delightful blend of large mushrooms, cream cheese, herbs, and roasted garlic. This combination delivers a rich, savory bite that will leave your guests raving about the flavor. These bite-sized delights are not only simple to prepare but are also sure to be a showstopper at any gathering.
Ingredients: - 12 large mushrooms, stems removed - 1 cup cream cheese, softened - 1/4 cup grated Parmesan cheese - 2 cloves garlic, roasted and minced - Salt and pepper to taste - Fresh herbs (thyme or parsley) for garnish
Instructions:
1. Preheat your oven to 375°F (190°C).
2. In a bowl, mix the softened cream cheese, grated Parmesan, roasted garlic, salt, and pepper until well combined.
3. Carefully stuff each mushroom cap with the cheese mixture, ensuring they are generously filled.
4. Arrange the stuffed mushrooms on a baking sheet, making sure they are spaced apart.
5. Bake in the preheated oven for about 20 minutes, or until the tops are golden and bubbly.
6. Remove from the oven and let them cool for a minute before garnishing with fresh herbs.
7. Serve warm and watch them disappear in no time!
Tips: - Use a variety of mushrooms for different flavors. - Serve warm for the best experience.
Frequently Asked Questions: 1. Can I make these vegetarian? Yes, all ingredients are vegetarian-friendly. 2. How do I store leftovers? Keep in an airtight container in the fridge.
For the best results, consider using a sturdy roasting pan to hold your stuffed mushrooms while they bake, and don't forget to garnish with fresh herbs for that final touch of flavor and presentation!
10. Unique Flatbreads with Toppings
Flatbreads serve as a delightful canvas for a variety of innovative toppings that are sure to impress your guests. Consider trying unique combinations such as fig and goat cheese, or perhaps pear and gorgonzola, for unexpected flavor pairings that will tantalize the palate.
These artisanal bites not only taste incredible but also look stunning, making them a fantastic addition to your appetizer spread. With store-bought flatbreads as your base, you can whip up these easy yet unique flavors in no time!
Ingredients:
- 2 store-bought flatbreads
- 4 oz fig jam
- 4 oz goat cheese, crumbled
- Fresh arugula or baby spinach
- 1 ripe pear, thinly sliced (for the pear and gorgonzola option)
- 4 oz gorgonzola cheese, crumbled (for the pear and gorgonzola option)
- Olive oil, for drizzling
- Balsamic glaze (optional, for drizzling)
- Fresh thyme or rosemary (optional, for garnish)
Instructions:
1. Preheat your oven to 400°F (200°C).
2. Place the flatbreads on a baking sheet.
3. For the fig and goat cheese flatbread, spread half of the fig jam evenly over one flatbread. Sprinkle half of the crumbled goat cheese on top.
4. For the pear and gorgonzola flatbread, spread the remaining fig jam on the second flatbread. Evenly distribute the sliced pears and sprinkle the gorgonzola cheese over them.
5. Drizzle a little olive oil over both flatbreads for added flavor.
6. Bake in the preheated oven for 8-10 minutes or until the cheese is bubbly and the edges of the flatbreads are golden.
7. Once out of the oven, top the fig and goat cheese flatbread with fresh arugula and an optional drizzle of balsamic glaze.
8. For the pear and gorgonzola flatbread, finish with a sprinkle of fresh thyme or rosemary.
9. Slice the flatbreads into bite-sized pieces using a quality cheese knife.
10. Arrange the flatbreads on a serving platter and enjoy the compliments from your guests!
With these elements, your flatbread appetizers will surely wow your guests!
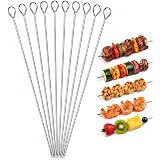
11. Mini Tacos with Unique Fillings
Mini tacos are an exciting and interactive appetizer that will surely impress your guests. They can personalize their bites by choosing from a variety of unique fillings, such as spiced jackfruit or succulent grilled shrimp.
These delightful mini corn tortillas provide a perfect base for your tacos, bursting with flavor and offering a hands-on dining experience that’s ideal for gatherings. To prepare, simply heat the jackfruit in a pan, grill the shrimp until cooked through, and warm the tortillas in a skillet. Assemble each mini taco with your choice of toppings, like diced avocado and fresh cilantro, and serve them in topping containers for added flair.
Your guests will love customizing their tacos, and they’ll appreciate the option of a delicious vegetarian filling with jackfruit!
### Ingredients:
For the Tacos:
- Mini corn tortillas (find them [here](https://www.amazon.com/dp/B09MSJVC5N?tag=4bsnet-21)) - 1 can of jackfruit in brine or water (drained and rinsed) - 1 lb of shrimp, peeled and deveined - 1 tablespoon olive oil - 1 teaspoon chili powder - 1 teaspoon cumin - Salt and pepper to taste
Toppings:
- Diced avocado - Fresh cilantro, chopped - Diced red onion - Lime wedges - Salsa or pico de gallo
### Instructions:
1. Prepare the Jackfruit: In a pan over medium heat, add the drained jackfruit. Stir in chili powder, cumin, salt, and pepper. Cook for about 10 minutes, breaking apart the jackfruit with a fork until it resembles pulled pork.
2. Grill the Shrimp: In another skillet, heat olive oil over medium heat. Add the shrimp and season with salt and pepper. Cook for about 3-4 minutes on each side until they turn pink and are cooked through.
3. Warm the Tortillas: In a skillet, warm the mini corn tortillas for about 30 seconds on each side, or until pliable.
4. Assemble the Tacos: Take a warmed tortilla and add a spoonful of either the spiced jackfruit or grilled shrimp.
5. Add Toppings: Top with diced avocado, chopped cilantro, and diced red onion. Serve with lime wedges and salsa on the side.
6. Serve: Present the mini tacos in topping containers to let your guests customize their own creations.
Enjoy these unexpected appetizers at your next gathering, and watch your guests marvel at the unique flavors!
12. Chocolate-Covered Bacon Bites
---
### 12. Chocolate-Covered Bacon Bites
If you’re looking to impress your guests with an unexpected appetizer, chocolate-covered bacon bites are a game changer! This delightful fusion of sweet chocolate and savory bacon creates a flavor explosion that will leave everyone talking. Not only do they taste amazing, but they’re also surprisingly simple to whip up, making them a great choice for any occasion.
The combination of rich chocolate chips draping over crispy bacon strips is sure to intrigue your guests. Just remember to let them cool on wax paper to maintain their delicious charm.
Ingredients:
- 8 slices of bacon - 1 cup of chocolate chips (your choice of dark, milk, or white) - Sea salt (optional, for sprinkling)
Instructions:
1. Preheat your oven to 400°F (200°C). Line a baking sheet with parchment paper.
2. Place the bacon strips on the baking sheet in a single layer. Bake for 15-20 minutes, or until crispy, flipping halfway through for even cooking.
3. Once cooked, transfer the bacon to a plate lined with paper towels to absorb excess grease.
4. While the bacon cools, melt the chocolate chips. You can do this in a microwave-safe bowl in 30-second increments, stirring in between, or use a melting bowl for a more controlled melt.
5. Dip each crispy bacon strip into the melted chocolate, ensuring it's evenly coated. Allow any excess chocolate to drip off.
6. Place the chocolate-covered bacon on a sheet of wax paper. If desired, sprinkle a pinch of sea salt on top for an extra flavor kick.
7. Let the chocolate set at room temperature or refrigerate for quicker results.
8. Once the chocolate has hardened, serve your chocolate-covered bacon bites on a platter and watch them disappear!
These bites are not just easy to make but also bring unique flavors that will truly wow your guests. Enjoy this epic unexpected recipe at your next gathering!
---
Conclusion
These 12 epic unexpected appetizers are sure to elevate your next gathering and impress your guests.
With unique flavors and delightful presentations, each recipe is designed to surprise and satisfy.
Try them out at your next event, and watch your guests rave about these delicious starters!
Note: We aim to provide accurate product links, but some may occasionally expire or become unavailable. If this happens, please search directly on Amazon for the product or a suitable alternative.
This post contains Amazon affiliate links, meaning I may earn a small commission if you purchase through my links, at no extra cost to you.
Date nights are a special time for you and your partner, and nothing sets the mood better than a delicious homemade meal.
However, with busy schedules and the desire for quality time together, cooking something special can feel overwhelming.
Fear not, this listicle features twelve quick date night meals that can be made in 30 minutes or less, allowing you to impress your loved one without the stress.
Get ready to unleash your inner chef with these simple yet delightful recipes, perfect for creating a cozy atmosphere at home.
1. Garlic Butter Shrimp Pasta
Indulge in the delightful combination of garlic and shrimp with this quick pasta dish that’s bursting with flavor. This rich and savory meal can be prepared in no time, making it perfect for a romantic evening. Begin by cooking your spaghetti in a quality pasta pot to achieve the ideal al dente texture.
As the pasta cooks, use a garlic press to easily crush fresh garlic, which will infuse the dish with a robust flavor. Toss the shrimp with the garlic, fresh parsley, and a splash of lemon juice, squeezed effortlessly with a lemon squeezer for an extra zing. To serve, use elegant serving utensils that will elevate your presentation. This delectable dish pairs beautifully with a crisp salad and a glass of white wine, setting the stage for a perfect romantic ambiance.
Ingredients:
- 8 oz spaghetti - 1 lb shrimp, peeled and deveined - 4 cloves garlic, minced - 1/4 cup unsalted butter - 1/4 cup fresh parsley, chopped - Juice of 1 lemon - Salt and pepper, to taste - Red pepper flakes (optional, for a bit of heat)
Instructions:
1. Cook the Pasta: In a large pot, bring salted water to a boil. Add the spaghetti and cook according to package instructions until al dente. Drain and set aside.
2. Prepare the Shrimp: In a large skillet over medium heat, melt the butter. Add the minced garlic and sauté for about 1 minute until fragrant.
3. Add the Shrimp: Toss the shrimp into the skillet, cooking for 2-3 minutes on each side or until they turn pink and opaque.
4. Season: Add the chopped parsley, lemon juice, salt, pepper, and red pepper flakes (if using). Stir well to combine all the flavors.
5. Combine: Add the cooked spaghetti to the skillet, tossing everything together until the pasta is evenly coated with the garlic butter sauce.
6. Serve: Plate the pasta and shrimp, garnishing with additional parsley if desired. Enjoy your quick date night meal!
This elegant dish impresses with its simplicity and delightful flavors. Juicy chicken breasts are stuffed with fresh mozzarella, ripe tomatoes, and fragrant basil, creating a burst of Mediterranean goodness.
To ensure your chicken is cooked to perfection, a reliable meat thermometer is essential. Drizzle the finished dish with balsamic reduction for a stunning presentation that also packs a protein punch.
For ease of preparation, use a sturdy cutting board and a sharp chef’s knife to slice your ingredients with precision.
Serve your Caprese stuffed chicken alongside a colorful medley of roasted vegetables for added nutrition. This dish is the perfect choice for a date night where you can showcase your culinary skills without too much hassle, and a durable baking dish will help you achieve that beautiful roasted finish.
### Ingredients:
- 2 large chicken breasts - 4 ounces fresh mozzarella cheese, sliced - 1 large ripe tomato, sliced - 1/4 cup fresh basil leaves - Salt and pepper, to taste - 2 tablespoons olive oil - Balsamic reduction, for drizzling
### Instructions:
1. Preheat your oven to 375°F (190°C).
2. Using a sharp chef’s knife, make a pocket in each chicken breast by slicing horizontally, but not all the way through.
3. Season the chicken breasts inside and out with salt and pepper.
4. Stuff each chicken breast with slices of fresh mozzarella, tomato, and a few basil leaves.
5. Heat olive oil in an oven-safe skillet over medium-high heat. Once hot, sear the stuffed chicken breasts for about 3-4 minutes on each side until golden brown.
6. Transfer the skillet to the preheated oven and bake for 20-25 minutes or until the internal temperature reaches 165°F (75°C) when checked with a meat thermometer.
7. Once cooked, remove from the oven and let the chicken rest for a few minutes.
8. Drizzle with balsamic reduction and garnish with additional basil if desired.
9. Serve with roasted vegetables or your favorite side for a complete meal.
This Caprese stuffed chicken is not just quick to prepare but also a delightful way to impress your date with minimal effort!
For a healthy and vibrant meal option, try your hand at a quick veggie stir-fry. This dish is not only easy to prepare but also allows for customization with your choice of seasonal vegetables. Using a high-quality wok will ensure that your veggies achieve that perfect crunch, while a savory soy sauce, enhanced with a hint of ginger, adds depth to the flavor.
To make your cooking experience even easier, consider using a rice cooker to prepare fluffy rice or noodles as the base for your stir-fry. For added convenience during prep, a reliable vegetable peeler can help you quickly prep your veggies, while a handy soy sauce dispenser allows for easy seasoning.
This one-pan dish is perfect for those who enjoy plant-based meals and offers an effortless cleanup, making it an ideal choice for a quick date night dinner.
Spice up your date night with a delightful taco evening! Start by preparing easy tacos using soft tortillas and your choice of protein, whether it’s seasoned ground beef, grilled chicken, or roasted veggies.
To elevate your taco experience, consider using a taco holder to keep everything neatly in place as you load them up with fresh salsa, avocado, and cilantro for that extra zing.
This meal is not only delicious but also interactive, allowing you and your date to customize your tacos just the way you like them.
For an added touch, serve your creations on a beautiful serving platter and don't forget to slice up some fresh ingredients with a reliable kitchen knife set for quick and easy prep.
Complete the fiesta vibe by pairing your tacos with a side of tortilla chips and guacamole served in a charming guacamole bowl! Enjoy your culinary adventure together!
Ingredients:
- 8 soft tortillas (flour or corn) - 1 pound ground beef, grilled chicken, or roasted veggies - 1 packet taco seasoning (or homemade seasoning) - 1 cup shredded lettuce - 1 cup diced tomatoes - 1 avocado, sliced - 1 cup shredded cheese (cheddar or Mexican blend) - Fresh cilantro, chopped - Salsa of choice - Sour cream (optional) - Tortilla chips (for serving) - Guacamole (for serving)
Instructions:
1. Cook the Protein: In a skillet over medium heat, cook your chosen protein until fully cooked. If using ground beef, drain excess fat and add taco seasoning according to package directions or to taste. Stir well to combine and let simmer for a few minutes.
2. Prepare the Toppings: While the protein is cooking, chop the lettuce, dice the tomatoes, slice the avocado, and chop the cilantro. Set aside.
3. Warm the Tortillas: In a separate pan or microwave, warm the soft tortillas until they are pliable.
4. Assemble the Tacos: Using a taco holder or just your hands, fill each tortilla with the cooked protein. Layer on the shredded lettuce, diced tomatoes, avocado slices, shredded cheese, and a sprinkle of fresh cilantro.
5. Add Condiments: Top each taco with salsa and a dollop of sour cream if desired.
6. Serve: Arrange the tacos on a serving platter alongside tortilla chips and guacamole. Enjoy your interactive taco night!
Lemon Herb Grilled Salmon is a fantastic choice for a quick date night meal. This dish is not only simple and fast to prepare, but it also brings a delightful burst of flavors that will impress your special someone. The combination of lemon, garlic, and fresh herbs creates a marinade that infuses the salmon with a refreshing taste, while the grilling process ensures a perfectly cooked and flaky texture.
Ingredients:
- 2 salmon fillets - 2 tablespoons olive oil - Juice of 1 lemon - Zest of 1 lemon - 2 garlic cloves, minced - 1 tablespoon fresh dill, chopped - 1 tablespoon fresh parsley, chopped - Salt and pepper, to taste
Instructions:
1. In a bowl, whisk together the olive oil, lemon juice, lemon zest, minced garlic, dill, parsley, salt, and pepper to create the marinade.
2. Place the salmon fillets in a shallow dish and pour the marinade over them, ensuring they are well-coated. Cover and let marinate in the refrigerator for at least 15 minutes.
3. Preheat your grill pan over medium-high heat.
4. Once hot, carefully place the salmon fillets on the grill pan, skin-side down if applicable.
5. Cook for about 4-5 minutes, depending on the thickness of the fillets.
6. Use a fish spatula to gently flip the salmon and grill for an additional 3-4 minutes until cooked through and flaky.
7. Remove from the grill and let rest for a minute before serving.
8. Pair the grilled salmon with asparagus or a mixed greens salad for a refreshing and balanced meal.
This meal can be prepared in under 30 minutes, allowing you to enjoy a stress-free evening focused on each other.
Risotto might sound like a dish only a gourmet chef could master, but you can easily whip it up in just one pot in under 30 minutes! This creamy one-pot mushroom risotto is a rich and comforting meal, perfect for a cozy date night at home. With a few simple ingredients—arborio rice, broth, mushrooms, and a sprinkle of parmesan—you can create a dish that feels indulgent yet straightforward.
To make the cooking process smoother, consider using a high-quality risotto pot for even heat distribution. Stirring with a sturdy wooden spoon will help you achieve that creamy texture, while a cheese grater makes it easy to add freshly grated parmesan that elevates the dish.
For the ultimate romantic touch, don't forget to serve your risotto with a glass of wine, which you can enhance using a wine aerator to bring out its best flavors. Enjoy your delightful meal in the comfort of your own home!
Ingredients:
- 1 cup arborio rice - 4 cups vegetable or chicken broth - 2 cups sliced mushrooms (such as cremini or button) - 1 small onion, finely chopped - 2 cloves garlic, minced - 1/2 cup dry white wine (optional) - 1/2 cup grated Parmesan cheese - 2 tablespoons olive oil - 2 tablespoons unsalted butter - Salt and pepper to taste - Fresh parsley, chopped (for garnish)
Instructions:
1. In a medium saucepan, heat the broth over low heat to keep it warm.
2. In a large risotto pot, heat olive oil and 1 tablespoon of butter over medium heat. Add onions and sauté until translucent, about 3 minutes.
3. Stir in the garlic and mushrooms, cooking until the mushrooms are tender, about 5 minutes.
4. Add the arborio rice to the pot, stirring to coat the grains with oil and toasting them for about 2 minutes.
5. Pour in the white wine (if using) and let it simmer until mostly absorbed.
6. Begin adding the warm broth one ladle at a time, stirring frequently. Wait until most of the liquid is absorbed before adding the next ladle.
7. Continue this process for about 18-20 minutes, until the rice is creamy and al dente.
8. Remove from heat and stir in the remaining tablespoon of butter and the grated Parmesan cheese. Season with salt and pepper to taste.
9. Serve immediately, garnished with fresh parsley and an extra sprinkle of Parmesan.
10. Pair with your favorite wine, and enjoy your quick date night meal!
Elevate your taco night with these delectable spicy shrimp tacos! They are not only quick to make but also bursting with flavor, thanks to the fresh shrimp sautéed with an array of spices and zesty lime.
To make the prep even easier, consider using a high-quality shrimp deveiner to clean and prepare your shrimp effortlessly.
Add a crunchy slaw and creamy avocado for a delightful contrast of taste and texture, and don't forget to serve your tacos in a convenient taco kit that makes assembly a breeze.
For an extra burst of flavor, squeeze fresh lime juice using a handy lime juicer and mix your ingredients in a spacious mixing bowl. This meal not only comes together in under 30 minutes but also offers a fun and relaxed dining experience. Serve with lime wedges and your favorite hot sauce for that perfect spicy kick!
Ingredients:
- 1 pound fresh shrimp, peeled and deveined - 2 tablespoons olive oil - 1 teaspoon chili powder - 1 teaspoon cumin - ½ teaspoon smoked paprika - ½ teaspoon garlic powder - Salt and pepper to taste - Juice of 1 lime - 8 small corn or flour tortillas - 1 cup shredded cabbage (for slaw) - 1 avocado, sliced - Fresh cilantro, for garnish - Lime wedges, for serving - Hot sauce, for serving
Instructions:
1. In a mixing bowl, toss the shrimp with olive oil, chili powder, cumin, smoked paprika, garlic powder, salt, and pepper. Squeeze half of the lime juice over the shrimp and mix well.
2. Heat a skillet over medium-high heat. Once hot, add the seasoned shrimp and sauté for about 3-4 minutes, or until the shrimp are opaque and cooked through. Remove from heat and set aside.
3. While the shrimp are cooking, prepare your crunchy slaw by mixing the shredded cabbage with the remaining lime juice in a separate bowl. Add salt and pepper to taste.
4. Warm the tortillas in a dry skillet or microwave until soft and pliable.
5. Assemble the tacos by placing a generous amount of sautéed shrimp in each tortilla. Top with the crunchy slaw and slices of avocado.
6. Garnish with fresh cilantro and serve with lime wedges and your favorite hot sauce for an extra kick.
Get ready to impress your date with this quick beef stir-fry that combines tenderness and vibrant colors in just a matter of minutes. With juicy strips of beef sautéed alongside crisp bell peppers and onions, this dish is as pleasing to the eye as it is to the palate.
The combination of savory soy sauce and a hint of sesame oil elevates the flavors, making each bite a delightful experience. Serve it over fluffy rice or toss it with noodles for a complete meal that looks and tastes gourmet, all while keeping your cooking time under 30 minutes.
Ingredients:
- 1 lb beef sirloin, thinly sliced - 2 tablespoons soy sauce - 1 tablespoon sesame oil - 1 tablespoon cornstarch - 2 tablespoons vegetable oil - 1 bell pepper (red, yellow, or green), sliced - 1 medium onion, sliced - 2 cloves garlic, minced - 1 teaspoon ginger, minced - Cooked rice or noodles, for serving - Chopped green onions, for garnish
Instructions:
1. In a bowl, combine the sliced beef, soy sauce, sesame oil, and cornstarch. Mix well and let it marinate for about 10 minutes to enhance the flavors.
2. Heat 1 tablespoon of vegetable oil in a high-quality stir-fry pan over medium-high heat. Add the marinated beef in a single layer and cook for 2-3 minutes until browned. Remove from the pan and set aside.
3. In the same pan, add the remaining tablespoon of oil. Sauté the sliced bell pepper and onion for about 3-4 minutes until they begin to soften.
4. Add the minced garlic and ginger, stirring well to combine. Cook for an additional minute until fragrant.
5. Return the beef to the pan and stir everything together. Cook for another 2-3 minutes until the beef is cooked through and the vegetables are tender-crisp.
6. Serve your beef stir-fry over fluffy rice or toss with noodles. Garnish with chopped green onions for a fresh finish.
This quick beef stir-fry is not only simple and fast but also a satisfying meal that’s perfect for a date night at home!
For a light and refreshing option, consider whipping up a Mediterranean quinoa salad! This vibrant dish is packed with an array of colorful veggies, aromatic herbs, and creamy feta cheese, making it both filling and nutritious.
Perfect for a summer evening, this salad not only pleases the palate but also adds a splash of color to your table. Plus, it’s simple enough to make in just 30 minutes, making it one of the best quick date night meals.
Ingredients:
- 1 cup quinoa, rinsed - 2 cups water or vegetable broth - 1 cup cherry tomatoes, halved - 1 cucumber, diced - 1 bell pepper (any color), diced - 1/4 red onion, finely chopped - 1/2 cup Kalamata olives, pitted and sliced - 1/2 cup feta cheese, crumbled - 1/4 cup fresh parsley, chopped - 1/4 cup fresh mint, chopped - Juice of 1 lemon - 1/4 cup high-quality olive oil - Salt and pepper, to taste
Instructions:
1. In a quinoa cooker, combine the rinsed quinoa and water (or vegetable broth). Cook according to the manufacturer's instructions until fluffy.
2. While the quinoa cooks, prepare the vegetables. In a large mixing bowl, combine the cherry tomatoes, cucumber, bell pepper, red onion, olives, feta cheese, parsley, and mint.
3. Once the quinoa is done, let it cool slightly before adding it to the vegetable mixture.
4. In a small bowl, whisk together the lemon juice, olive oil, salt, and pepper.
5. Pour the dressing over the quinoa salad and toss gently to combine all the ingredients.
6. Taste and adjust seasoning if necessary.
7. Serve immediately in a beautiful salad bowl, or refrigerate for 30 minutes to let the flavors meld together.
This Mediterranean quinoa salad is ideal for a summer date night or whenever you crave something light yet satisfying. For a complete meal, pair it with grilled chicken or fish to impress your special someone!
Sizzle up some delicious flavor with quick chicken fajitas! Tender, marinated chicken strips are cooked alongside vibrant bell peppers and onions, all served in warm tortillas. This fun meal allows you and your partner to build your own fajitas, making it interactive and enjoyable.
To make your fajitas, you'll need the following ingredients:
Ingredients:
- 1 lb chicken breast, sliced into strips - 2 tablespoons olive oil - 2 tablespoons fajita seasoning (store-bought or homemade) - 1 red bell pepper, sliced - 1 green bell pepper, sliced - 1 onion, sliced - 8 small flour tortillas - Optional toppings: sour cream, shredded cheese, guacamole, salsa, fresh cilantro, lime wedges
Instructions:
1. In a bowl, combine the sliced chicken, olive oil, and fajita seasoning. Mix well to coat the chicken evenly. Let it marinate for at least 15 minutes.
2. Heat your fajita skillet over medium-high heat. Add the marinated chicken and cook for about 5-7 minutes until the chicken is cooked through and slightly browned.
3. Add the sliced bell peppers and onion to the skillet. Continue to cook for another 5 minutes, stirring occasionally, until the vegetables are tender.
4. While the chicken and vegetables are cooking, warm the tortillas in a tortilla warmer or directly on the skillet for a few seconds on each side.
5. Serve the chicken and vegetable mixture in the warm tortillas, allowing everyone to customize their fajitas with their favorite toppings.
This meal is perfect for those who love Mexican cuisine but want to keep it simple while still impressing their partner. Enjoy!
For a quick and delicious meal, why not whip up some pesto chicken flatbreads? Start with store-bought flatbreads, which serve as the perfect base.
Top them with vibrant pesto, grilled chicken, and an assortment of fresh veggies for a burst of flavor.
Once assembled, place them on a baking sheet and bake until they are golden and bubbly, creating a delightful dish that’s perfect for sharing.
This meal strikes a balance between being light yet satisfying, making it ideal for a casual date night.
---
Ingredients:
- 2 store-bought flatbreads - 1 cup pesto - 1 cup cooked grilled chicken, shredded or sliced - 1 cup cherry tomatoes, halved - 1 cup fresh spinach or arugula - ½ cup mozzarella cheese, shredded - Olive oil (for drizzling) - Salt and pepper to taste
---
Instructions:
1. Preheat your oven to 400°F (200°C).
2. Place the flatbreads on a baking sheet lined with parchment paper.
3. Spread a generous layer of pesto over each flatbread, covering the surface evenly.
4. Top with shredded or sliced grilled chicken, distributing it evenly across both flatbreads.
5. Add halved cherry tomatoes and fresh spinach or arugula on top of the chicken.
6. Sprinkle the shredded mozzarella cheese over the entire surface of each flatbread.
7. Drizzle a little olive oil over the top and season with salt and pepper to taste.
8. Bake in the preheated oven for 10-12 minutes, or until the cheese is melted and bubbly, and the edges of the flatbreads are golden.
9. Remove from the oven and let cool for a couple of minutes.
10. Slice into pieces using a pizza cutter and serve on a beautiful serving platter.
11. Pair with a refreshing side salad to complete the experience!
---
This recipe not only comes together quickly but also delivers on flavor, making it a top choice for your next date night. Enjoy!
End your date night on a delightful note with these sweet and spicy glazed meatballs! These juicy bites are expertly coated in a sticky glaze made from soy sauce, brown sugar, and sriracha, delivering a perfect balance of heat and sweetness.
For a fun and interactive dining experience, serve the meatballs on skewers. This not only adds a playful element to your meal but also makes for easy handling.
If you want to take your meatball-making to the next level, consider using a meatball maker to achieve perfectly shaped meatballs every time. And don’t forget to brush on that delicious glaze with a sauce brush for an even coating.
Serve your meatballs on a stylish serving dish alongside steamed rice or a simple side salad for a complete and satisfying meal. This dish is sure to impress anyone who enjoys a touch of heat with their sweetness, making it an exciting addition to your date night menu!
Ingredients:
- 1 pound ground beef (or turkey) - 1/2 cup breadcrumbs - 1/4 cup chopped green onions - 1 egg - 2 cloves garlic, minced - 1 teaspoon ginger, minced - 1/4 teaspoon black pepper - 1/4 teaspoon salt
For the glaze:
- 1/4 cup soy sauce - 1/4 cup brown sugar - 2 tablespoons sriracha (adjust to taste) - 1 tablespoon rice vinegar - 1 teaspoon sesame oil (optional)
Instructions:
1. In a large bowl, combine the ground meat, breadcrumbs, green onions, egg, garlic, ginger, black pepper, and salt. Mix until well combined.
2. Preheat your oven to 400°F (200°C) and line a baking sheet with parchment paper.
3. Form the meat mixture into bite-sized meatballs and place them on the prepared baking sheet.
4. Bake the meatballs for 15-20 minutes, or until cooked through and browned.
5. While the meatballs are baking, prepare the glaze. In a small saucepan, combine soy sauce, brown sugar, sriracha, rice vinegar, and sesame oil. Heat over medium until the sugar dissolves, stirring occasionally.
6. Once the meatballs are done, remove them from the oven and toss them in the glaze until well coated.
7. Serve the glazed meatballs on skewers, and enjoy with steamed rice or a simple salad on the side.
This recipe offers a simple and fast way to create a memorable meal that’s perfect for any date night!
Cooking for a date night doesn’t have to be complicated or time-consuming.
These twelve quick meals are designed to impress while allowing you to spend more time together and less time in the kitchen.
So grab your apron, pick a recipe, and enjoy creating a memorable evening filled with delicious food and great conversation.
Note: We aim to provide accurate product links, but some may occasionally expire or become unavailable. If this happens, please search directly on Amazon for the product or a suitable alternative.
This post contains Amazon affiliate links, meaning I may earn a small commission if you purchase through my links, at no extra cost to you.
Galentine's Day is all about celebrating friendship, and what better way to do that than with a feast of delightful treats?
Whether you're gathering for a festive brunch or an evening of laughter and bonding, these finger foods are perfect for sharing.
From heart-shaped pastries to chocolate-covered strawberries, each treat is designed to impress and create unforgettable memories with your favorite ladies.
Heartfelt Strawberry Cream Puffs
These charming heart-shaped strawberry cream puffs are not only a visual delight but also a mouthwatering treat.
With a light and flaky pastry filled with luscious whipped cream and fresh strawberries, each bite is a perfect balance of sweetness.
Drizzled with rich chocolate and dusted with powdered sugar, they are sure to steal the spotlight at your Galentine's gathering.
Indulge in these treats with your friends as you share stories and laughter, making every moment sweeter.
---
### Ingredients:
For the Choux Pastry:
- 1 cup water - 1/2 cup unsalted butter - 1 cup all-purpose flour - 1/4 teaspoon salt - 4 large eggs
For the Strawberry Filling:
- 1 cup heavy whipping cream - 2 tablespoons powdered sugar - 1 teaspoon vanilla extract - 1 cup fresh strawberries, hulled and sliced
1. Preheat the Oven: Preheat your oven to 400°F (200°C). Line a baking sheet with parchment paper.
2. Prepare the Choux Pastry: In a medium saucepan, bring water and butter to a boil. Remove from heat, then stir in flour and salt until the mixture forms a ball. Let it cool for a few minutes.
3. Add Eggs: One at a time, beat in the eggs until the dough is smooth and glossy.
4. Pipe the Pastry: Transfer the dough to a piping bag fitted with a large round tip. Pipe heart shapes onto the prepared baking sheet, leaving space between each puff.
5. Bake: Bake for 20-25 minutes, or until the puffs are golden brown and puffed up. Turn off the oven and let them cool inside for 10 minutes.
6. Make the Filling: In a large bowl, whip the heavy cream, powdered sugar, and vanilla until stiff peaks form. Gently fold in the sliced strawberries.
7. Assemble the Puffs: Once the pastries have cooled, cut them in half and fill each with the strawberry cream mixture.
8. Prepare the Chocolate Drizzle: In a microwave-safe bowl, melt the chocolate chips and coconut oil together in 30-second intervals, stirring until smooth.
9. Drizzle and Dust: Drizzle the melted chocolate over the filled cream puffs and dust with powdered sugar.
10. Serve: Arrange the heart-shaped strawberry cream puffs on a platter and share them with your friends at your Galentine's gathering for a delightful treat that everyone will love!
Chocolate-Dipped Heart Strawberries
Indulge your friends this Galentine's Day with these charming chocolate-dipped heart strawberries. They are not only delicious but also bring a touch of elegance to your gathering. The combination of sweet strawberries and rich chocolate creates a delightful treat that’s perfect for sharing. Arrange them on skewers for a fun and interactive way for your friends to enjoy these delightful finger foods.
Ingredients:
- 1 pound fresh strawberries (preferably with green stems) - 8 ounces semi-sweet or dark chocolate chips - 1 tablespoon coconut oil (optional, for a smoother chocolate) - Pink or red sprinkles (optional, for decoration)
Instructions:
1. Begin by washing the strawberries gently under cold water and patting them dry with paper towels. Make sure they are completely dry for the chocolate to adhere properly.
2. Line a baking sheet with parchment paper to set the dipped strawberries.
3. In a microwave-safe bowl, combine the chocolate chips and coconut oil. Microwave in 30-second intervals, stirring in between, until the chocolate is fully melted and smooth.
4. Hold each strawberry by the green stem and dip it into the melted chocolate, covering about two-thirds of the strawberry. Allow any excess chocolate to drip off.
5. Place the dipped strawberry onto the prepared baking sheet. If desired, sprinkle with pink or red sprinkles before the chocolate sets.
6. Continue dipping each strawberry until all are coated.
7. Once finished, refrigerate the strawberries for about 30 minutes or until the chocolate is firm.
8. For an adorable presentation, thread the strawberries onto skewers before serving, creating a fun and festive display.
9. Serve these elegant treats on a platter, and watch as your friends swoon over this irresistible Galentine's treat!
10. Enjoy the joy of sharing these delectable finger foods with your closest friends!
Sweet Berry Cream Cheese Pastries
These heart-shaped pastries filled with cream cheese and topped with fresh strawberries are a delightful addition to your Galentine's spread.
Golden and flaky, these pastries are not only visually appealing but also bursting with flavor.
The combination of creamy filling and juicy strawberries creates a perfect treat for sharing.
Your friends will love grabbing these pastries for a sweet bite during your celebration.
Ingredients:
- 1 sheet of puff pastry (thawed, if frozen)
- 8 oz cream cheese (softened)
- 1/4 cup powdered sugar
- 1 tsp vanilla extract
- 1 cup fresh strawberries (sliced)
- 1 egg (beaten, for egg wash)
- Optional: additional powdered sugar for dusting
Instructions:
1. Preheat your oven to 400°F (200°C). Line a baking sheet with parchment paper.
2. Roll out the puff pastry on a lightly floured surface. Cut out heart shapes using a cookie cutter or by hand.
3. In a mixing bowl, combine the softened cream cheese, powdered sugar, and vanilla extract. Mix until smooth and creamy.
4. Place a spoonful of the cream cheese mixture in the center of half of the heart shapes.
5. Top with a few slices of fresh strawberries.
6. Moisten the edges of the filled hearts with a little water, then place another heart shape on top. Press the edges to seal.
7. Brush the tops of the pastries with the beaten egg for a golden finish.
8. Bake in the preheated oven for 15-20 minutes, or until the pastries are golden brown and puffed.
9. Allow to cool slightly before dusting with powdered sugar.
10. Serve warm or at room temperature, and enjoy sharing these delightful Galentine's treats with your friends!
Heart-Shaped Pepperoni Pizzas
Heart-Shaped Pepperoni Pizzas
Who said Galentine's treats have to be all sweet? These adorable heart-shaped pepperoni pizzas add a savory touch to your party.
With a crispy crust topped with gooey cheese and pepperoni, they are perfect for satisfying those savory cravings.
Easy to share and even easier to devour, these mini pizzas will be a hit among your friends.
Gather around and enjoy a slice while reminiscing about your favorite memories together.
Ingredients:
- 1 package of pre-made pizza dough - 1 cup pizza sauce - 2 cups shredded mozzarella cheese - 1 cup sliced pepperoni - Olive oil (for brushing) - Italian seasoning (optional) - Flour (for dusting)
Instructions:
1. Preheat your oven to 450°F (230°C).
2. On a floured surface, roll out the pizza dough to about ¼ inch thick.
3. Use a heart-shaped cookie cutter to cut out heart shapes from the dough.
4. Place the heart-shaped dough on a baking sheet lined with parchment paper.
5. Spread a spoonful of pizza sauce on each heart, leaving a small border around the edges.
6. Sprinkle a generous amount of shredded mozzarella cheese over the sauce.
7. Top with slices of pepperoni and a sprinkle of Italian seasoning if desired.
8. Brush the edges of the dough with a little olive oil for a golden finish.
9. Bake in the preheated oven for 10-12 minutes, or until the crust is golden and the cheese is bubbly.
10. Remove from the oven and let cool slightly before serving. Enjoy these delightful finger foods as you celebrate Galentine’s with your friends!
Raspberry Pinwheel Pastries
Raspberry Pinwheel Pastries
These raspberry pinwheel pastries are both delicate and delicious, making them a must-have for your Galentine's celebration.
With their swirled design and sweet raspberry filling, they are as pretty as they are tasty.
Topped with a drizzle of white chocolate and a sprinkle of crushed raspberries, these treats are perfect for sharing.
They bring a touch of elegance to your gathering, making your friends feel special with every bite.
Ingredients:
- 1 sheet of puff pastry, thawed - 1 cup raspberry jam or fresh raspberries - 1 cup cream cheese, softened - 1 teaspoon vanilla extract - 1 cup powdered sugar - 1/2 cup white chocolate chips - Fresh raspberries, for garnish - Flour, for dusting
Instructions:
1. Preheat your oven to 400°F (200°C) and line a baking sheet with parchment paper.
2. On a lightly floured surface, roll out the puff pastry sheet to smooth it out.
3. In a bowl, mix the cream cheese, powdered sugar, and vanilla extract until smooth.
4. Spread the cream cheese mixture evenly over the puff pastry, leaving a small border around the edges.
5. If using fresh raspberries, mash them slightly and spread them over the cream cheese layer. If using raspberry jam, spread it directly on top.
6. Starting from one edge, carefully roll the pastry tightly into a log.
7. Slice the log into 1-inch pinwheels and place them on the prepared baking sheet.
8. Bake for 15-18 minutes or until golden brown and puffed.
9. While the pastries are baking, melt the white chocolate chips in a microwave-safe bowl, stirring every 30 seconds until smooth.
10. Once the pastries are out of the oven and slightly cooled, drizzle the melted white chocolate over the tops.
11. Sprinkle crushed raspberries on top for added flavor and presentation.
12. Serve these delightful pastries warm or at room temperature, and enjoy sharing them with your friends at your Galentine's gathering!
Colorful Galentine's Day Cookies
Colorful Galentine's Day Cookies
Celebrate Galentine's Day with these vibrant cookies that are sure to bring joy to your festivities! Adorned with festive sprinkles and delightful heart shapes, these cookies are not only a treat for the taste buds but also a visual feast. The colorful sprinkles and fun shapes make them irresistible, ensuring your friends will keep coming back for more. Enjoy these delightful cookies fresh from the oven while sharing laughs and stories with your favorite gals.
Ingredients:
- 2 ½ cups all-purpose flour - 1 teaspoon baking powder - ½ teaspoon baking soda - ¼ teaspoon salt - 1 cup unsalted butter, softened - 1 cup granulated sugar - ½ cup brown sugar, packed - 1 large egg - 2 teaspoons vanilla extract - 1 cup colorful sprinkles - Heart-shaped cookie cutter
Instructions:
1. Preheat your oven to 350°F (175°C) and line a baking sheet with parchment paper.
2. In a bowl, whisk together the flour, baking powder, baking soda, and salt. Set aside.
3. In a separate large mixing bowl, cream together the softened butter, granulated sugar, and brown sugar until light and fluffy.
4. Add the egg and vanilla extract to the butter mixture, mixing until fully incorporated.
5. Gradually add the dry ingredients to the wet ingredients, mixing until just combined.
6. Fold in the colorful sprinkles, reserving a few for decoration.
7. Roll the dough into balls, then flatten them slightly on the prepared baking sheet.
8. Use a heart-shaped cookie cutter to cut out shapes, re-rolling the dough as necessary.
9. Sprinkle additional sprinkles on top of each cookie before baking.
10. Bake for 10-12 minutes, or until the edges are golden. Let them cool on the baking sheet for a few minutes before transferring to a wire rack to cool completely.
These colorful cookies are perfect for sharing and will be a hit at your Galentine's Day celebration! Enjoy making and eating these delightful treats with your friends.
Strawberry Puff Pastry Hearts
These delightful strawberry puff pastry hearts are sure to impress with their beautiful presentation and delicious flavor.
Filled with creamy goodness and topped with fresh strawberries, they create a delightful combination of textures.
The light and flaky pastry makes them perfect for sharing, and the heart shape adds a special touch for your Galentine's celebration.
Everyone will love indulging in these delightful treats as they savor the sweetness of friendship.
Ingredients:
- 1 sheet of puff pastry (thawed) - 1 cup cream cheese (softened) - 1/4 cup powdered sugar - 1 teaspoon vanilla extract - 1 cup fresh strawberries (sliced) - 1 egg (beaten, for egg wash) - Optional: additional powdered sugar for dusting
Instructions:
1. Preheat your oven to 400°F (200°C). Line a baking sheet with parchment paper.
2. Roll out the puff pastry on a lightly floured surface until it’s about 1/8 inch thick.
3. Using a heart-shaped cookie cutter, cut out heart shapes from the pastry. You should have enough for a top and bottom for each heart.
4. In a mixing bowl, combine the softened cream cheese, powdered sugar, and vanilla extract. Beat until smooth and creamy.
5. Place half of the heart-shaped pastry pieces on the prepared baking sheet. Spoon a small dollop of the cream cheese mixture onto each heart.
6. Top each with a second heart-shaped pastry piece. Press the edges gently to seal them together.
7. Brush the tops of the hearts with the beaten egg for a golden finish.
8. Bake in the preheated oven for 15-20 minutes, or until the pastry is puffed and golden brown.
9. Once baked, allow them to cool slightly before topping with fresh strawberry slices.
10. For an extra touch, dust with powdered sugar before serving.
These strawberry puff pastry hearts are the perfect addition to your Galentine's treats, ideal for sharing and guaranteed to be a hit among friends!
Pink Oreo Truffle Balls
These adorable pink Oreo truffle balls are a fun and delicious treat that everyone will love.
Covered in a sweet pink coating and decorated with sprinkles, they are both visually appealing and rich in flavor.
Each bite is a creamy explosion of Oreo goodness, making them perfect for sharing at your Galentine's party.
Your friends will be delighted as they enjoy these bite-sized treats while catching up and celebrating your friendship.
Ingredients:
- 1 package of Oreo cookies (about 15-18 cookies) - 8 oz cream cheese, softened - 1 cup pink candy melts - 1 tbsp coconut oil (optional, for thinning the candy melts) - Sprinkles (for decoration)
Instructions:
1. Crush the Oreos: In a food processor, crush the Oreo cookies into fine crumbs. You can also place them in a zip-top bag and crush them with a rolling pin if you don’t have a processor.
2. Mix with Cream Cheese: In a mixing bowl, combine the crushed Oreos with the softened cream cheese. Mix until well combined and it forms a dough-like consistency.
3. Form the Balls: Using your hands, scoop out small portions of the mixture and roll them into bite-sized balls. Place them on a baking sheet lined with parchment paper.
4. Chill: Refrigerate the truffle balls for about 30 minutes to firm up.
5. Melt the Candy Coating: In a microwave-safe bowl, melt the pink candy melts according to the package instructions. If desired, mix in coconut oil to achieve a smoother consistency.
6. Coat the Truffles: Dip each chilled truffle ball into the melted pink candy coating, ensuring it’s fully covered. Use a fork to remove it and allow any excess coating to drip off.
7. Decorate: Place the coated truffles back on the parchment paper and immediately sprinkle them with your favorite sprinkles before the coating hardens.
8. Set and Serve: Let the truffles sit at room temperature until the coating is set. Once set, they are ready to be served and shared!
These delightful pink Oreo truffle balls are sure to be a hit at your Galentine's gathering, making them a must-have in your lineup of finger foods!
Homemade Reese's Hearts
Nothing says love like these homemade Reese's hearts!
Crafted with creamy peanut butter and enveloped in rich chocolate, they are a decadent treat that will leave everyone wanting more.
These sweet delights are perfect for sharing, making them an excellent addition to your Galentine's spread.
Watch your friends' eyes light up as they take a bite of these irresistible treasures.
1. In a medium bowl, combine the creamy peanut butter and powdered sugar. Mix until well combined and smooth.
2. Melt the chocolate chips and coconut oil together in a microwave-safe bowl, heating in 30-second intervals and stirring in between until fully melted and smooth.
3. Spoon a small amount of melted chocolate into each heart-shaped mold, covering the bottom. Tap the mold gently to ensure the chocolate spreads evenly.
4. Add a dollop of the peanut butter mixture on top of the chocolate layer, filling each mold about 3/4 of the way full.
5. Pour more melted chocolate over the peanut butter layer, covering it completely. Make sure each heart is filled to the top.
6. Place the mold in the refrigerator for about 30 minutes or until the chocolate has completely set.
7. Once firm, gently pop the Reese's hearts out of the mold and enjoy.
These homemade Reese's hearts are sure to become a favorite among your Galentine's treats, perfect for sharing with your best friends!
Conclusion
With these ten delightful treats, your Galentine's celebration is sure to be a hit!
From sweet to savory, each dish brings something special to the table, creating an unforgettable experience with your friends.
So gather your favorite ladies, share these treats, and celebrate the beautiful bonds of friendship.
Valentine's Day is the perfect occasion to whip up some sweet treats with your loved one, and what better way to celebrate than with adorable, delicious cupcakes?
These 12 easy Valentine's cupcake recipes will not only ignite your creativity in the kitchen but also create lasting memories as you bake together.
Get ready to indulge in delightful flavors, vibrant colors, and a sprinkle of love as you explore these romantic cupcake ideas that are perfect for date night!
1. Strawberry Shortcake Cupcakes
Indulge in the romantic charm of these Strawberry Shortcake Cupcakes, a delightful twist on the beloved classic dessert.
Beginning with a moist vanilla cupcake base, these treats are enhanced by a generous layer of whipped cream, which you can easily create using a whipped cream dispenser. Top your cupcakes with fresh strawberries for a refreshing burst of flavor—ensure you pick up some of the finest fresh strawberries to elevate your dessert.
The combination of fluffy textures and fruity flavors makes for a romantic experience with every bite.
Ingredients:
- 1 cup all-purpose flour - 1/2 cup granulated sugar - 1/2 cup unsalted butter, softened - 2 large eggs - 1/2 cup milk - Whipped cream (made using a whipped cream dispenser) - Fresh strawberries, sliced
Instructions:
1. Preheat your oven to 350°F (175°C) and line a muffin tray with pink cupcake liners.
2. In a mixing bowl, cream together the softened butter and sugar until light and fluffy.
3. Add the eggs, one at a time, mixing well after each addition.
4. Gradually add the flour and milk, alternating between the two, until the batter is smooth.
5. Spoon the batter into the prepared cupcake liners, filling each about two-thirds full.
6. Bake in the preheated oven for 20 minutes or until a toothpick inserted into the center comes out clean.
7. Allow the cupcakes to cool completely on a wire rack.
8. Once cooled, carefully slice the tops off the cupcakes.
9. Fill each cupcake with a generous dollop of whipped cream.
10. Garnish with fresh strawberry slices on top of the whipped cream.
11. For an extra touch, consider using a cupcake decorating set to make your cupcakes visually stunning.
12. Serve these delightful cupcakes for a romantic dessert experience perfect for date night!
Perfect for surprising your loved one with a sweet treat!
Red Velvet Cupcakes are truly the quintessential treat for Valentine's Day, thanks to their stunning deep red color that symbolizes love and passion. These delightful cupcakes are not only rich and moist but are also crowned with a luscious cream cheese frosting that beautifully complements their chocolatey flavor.
To whip up this romantic dessert, follow these simple steps:
Ingredients:
- 1 1/2 cups all-purpose flour - 1 cup granulated sugar - 1 teaspoon baking soda - 1 teaspoon cocoa powder - 1 cup vegetable oil - 1 cup buttermilk - 1 egg - 1 tablespoon red food coloring - 1 teaspoon vanilla extract - 1/2 teaspoon salt
1. Preheat your oven to 350°F (175°C) and line a cupcake pan with paper liners.
2. In a large mixing bowl, whisk together the flour, sugar, baking soda, cocoa powder, and salt until well combined.
3. In a separate bowl, mix the vegetable oil, buttermilk, egg, red food coloring, and vanilla extract until smooth.
4. Gradually add the wet ingredients to the dry ingredients, stirring until just combined. Be careful not to overmix.
5. Divide the batter evenly among the cupcake liners, filling each about two-thirds full.
6. Bake in the preheated oven for 20-25 minutes, or until a toothpick inserted into the center comes out clean.
7. Remove the cupcakes from the oven and let them cool in the pan for about 5 minutes before transferring them to a wire rack to cool completely.
8. While the cupcakes are cooling, prepare the cream cheese frosting. In a medium bowl, beat together the softened cream cheese and butter until creamy.
9. Gradually add in the powdered sugar and vanilla extract, beating until smooth and fluffy.
10. Once the cupcakes are completely cool, generously frost each with the cream cheese frosting.
To elevate your presentation, consider using decorative cupcake stands that will make these sweet treats even more inviting! Don't forget to stock up on baking soda to ensure your cupcakes rise perfectly!
Indulge your sweetheart with these delightful Chocolate Lava Cupcakes, filled with a warm, molten chocolate center that’s sure to impress any chocolate lover. The magic of slicing into these cupcakes and watching the rich chocolate flow out is an experience you won’t want to miss. Perfect for a romantic evening, these treats are both simple to make and wonderfully decadent.
### Ingredients:
- 4 oz high-quality dark chocolate, chopped - 1/2 cup unsalted butter - 2 large eggs - 1/2 cup granulated sugar - 1/4 cup all-purpose flour - Powdered sugar, for dusting - Optional: Ice cream for serving
### Instructions:
1. Preheat your oven to 425°F (220°C) and grease a muffin tin. For easier cleanup, line it with silicone baking mats.
2. In a microwave-safe bowl, melt the dark chocolate and butter together until smooth, stirring occasionally. Let it cool slightly.
3. In a separate bowl, whisk together the eggs and granulated sugar until well combined and slightly frothy.
4. Add the melted chocolate mixture to the egg mixture, stirring until fully incorporated.
5. Gently fold in the flour until just combined, being careful not to overmix.
6. Pour the batter into the prepared muffin tin, filling each cup about 3/4 full.
7. Bake for 12-14 minutes, or until the edges are set but the centers are still soft.
8. Allow the cupcakes to cool for 1 minute before carefully inverting them onto plates.
9. Dust with powdered sugar for a beautiful presentation and serve warm, ideally with a scoop of ice cream.
Enjoy the gooey surprise inside these luscious cupcakes and make your Valentine's celebration unforgettable!
Raspberry Almond Cupcakes are truly a match made in dessert heaven, perfectly blending the tartness of fresh raspberries with the sweet, nutty essence of almond. These delightful cupcakes are not only delicious but also easy to make, making them an ideal choice for a cozy date night in.
Imagine the joy of creating these sweet treats together, filling your kitchen with the delightful aroma of baking. With just a few simple steps, you can whip up a batch that will impress your loved one and create lasting memories.
Ingredients:
- 1 cup all-purpose flour - 1 cup granulated sugar - 1/2 cup unsalted butter, softened - 2 large eggs - 1 teaspoon almond extract - 1 cup fresh raspberries
Instructions:
1. Preheat your oven to 350°F (175°C) and line a cupcake pan with liners.
2. In a large mixing bowl, cream together the softened butter and sugar until light and fluffy.
3. Add the eggs one at a time, mixing well after each addition.
4. Stir in the almond extract until well combined.
5. Gradually add the flour to the mixture, mixing until just combined.
6. Gently fold in the fresh raspberries, being careful not to break them apart.
7. Fill each cupcake liner about two-thirds full with the batter.
8. Bake in the preheated oven for approximately 20 minutes, or until a toothpick inserted into the center comes out clean.
9. Once baked, allow the cupcakes to cool completely on a wire rack.
10. For the finishing touch, pipe almond-flavored buttercream on top using piping bags for an elegant presentation.
11. Serve your beautiful cupcakes on a stylish cupcake stand for a lovely display.
12. Enjoy these delightful treats together on a cozy picnic blanket for the perfect romantic touch.
With their unique flavor combination, these Raspberry Almond Cupcakes are sure to make your Valentine's Day special and sweet!
Add a playful twist to your Valentine's Day celebration with these delightful Funfetti Heart Cupcakes! Start by preparing a simple vanilla cupcake batter and fold in colorful sprinkles for a cheerful surprise. To shape your cupcakes, use heart-shaped cookie cutters to create adorable heart-shaped cakes from the baked cupcakes.
Layer them with creamy frosting and get creative by decorating with even more sprinkles for that extra festive touch. Don’t forget to enhance the flavor with quality vanilla extract for a rich taste. Once your cupcakes are ready, showcase them on a beautiful cupcake stand to impress your loved one. You can also use decorative frosting bags to pipe your icing with flair. This fun and colorful recipe is sure to spark joy and laughter during your date night!
Ingredients:
- 1 ½ cups all-purpose flour - 1 cup granulated sugar - ½ cup unsalted butter, softened - 2 large eggs - 1 teaspoon vanilla extract - ½ cup milk - 1 ½ teaspoons baking powder - ¼ teaspoon salt - ½ cup colorful sprinkles (plus more for decoration) - Creamy frosting of your choice
Instructions:
1. Preheat your oven to 350°F (175°C) and line a muffin tin with cupcake liners.
2. In a large mixing bowl, cream together the softened butter and sugar until light and fluffy.
3. Add the eggs, one at a time, mixing well after each addition. Stir in the vanilla extract.
4. In a separate bowl, whisk together the flour, baking powder, and salt.
5. Gradually add the dry ingredients to the wet mixture, alternating with the milk. Mix until just combined and fold in the colorful sprinkles.
6. Fill the cupcake liners about two-thirds full with the batter.
7. Bake for 18-20 minutes, or until a toothpick inserted into the center comes out clean. Let them cool completely.
8. Once cooled, use heart-shaped cookie cutters to cut out heart shapes from the cupcakes.
9. Frost the heart-shaped cakes generously with your favorite creamy frosting.
10. Decorate with additional sprinkles for a festive flair.
11. Arrange your beautiful cupcakes on a cupcake stand and enjoy your sweet treats with your loved one!
Coconut Cream Cupcakes are the perfect sweet treats to impress your loved one this Valentine's Day. With a luscious coconut frosting and a tender cupcake base, these delightful bites will transport you to a tropical paradise. The combination of creamy frosting and shredded coconut adds a unique flavor that will surely make your date night memorable.
Here’s how to make these dreamy Coconut Cream Cupcakes:
Ingredients:
- 1 cup all-purpose flour - 1 cup granulated sugar - 1/2 cup unsalted butter, softened - 2 large eggs - 1 cup shredded coconut - 1/2 cup cream cheese, softened - 1/4 cup unsweetened coconut cream - 2 cups powdered sugar - 1 teaspoon vanilla extract - Additional shredded coconut or toasted coconut flakes for topping
Instructions:
1. Preheat your oven to 350°F (175°C) and line your baking pans with cupcake liners or silicone baking cups.
2. In a mixing bowl, cream together the softened butter and granulated sugar until light and fluffy.
3. Add the eggs one at a time, mixing well after each addition.
4. Gradually add the flour and shredded coconut to the mixture, stirring until just combined.
5. Pour the batter evenly into the prepared baking pans and bake for about 20 minutes, or until a toothpick inserted into the center comes out clean.
6. While the cupcakes are baking, prepare the coconut cream cheese frosting. In a separate bowl, beat together the softened cream cheese and coconut cream until smooth.
7. Gradually add the powdered sugar and vanilla extract, mixing until the frosting is creamy and spreadable.
8. Once the cupcakes have cooled completely, generously frost each cupcake with the coconut cream cheese frosting.
9. Finish with a sprinkle of shredded coconut or toasted coconut flakes on top for added texture and flavor.
These Coconut Cream Cupcakes are not only visually appealing but also a delightful treat to share with your partner. Enjoy the flavors of love with these easy recipes that are perfect for a romantic evening!
For a delightful twist this Valentine’s Day, consider making these stunning Matcha Green Tea Cupcakes. Not only do they boast a vibrant green color that catches the eye, but they also offer a unique flavor that adventurous couples will love. These easy recipes are perfect for creating sweet treats that will impress your loved one.
Ingredients: - 1 cup all-purpose flour - 1 cup granulated sugar - 1/2 cup unsalted butter, softened - 2 large eggs - 2 teaspoons matcha green tea powder - Whipped cream for frosting - Edible flowers for garnish (optional) - Additional matcha for sprinkling
Instructions:
1. Preheat your oven to 350°F (175°C) and prepare your silicone baking molds by greasing them lightly or using a non-stick spray.
2. In a mixing bowl, cream together the softened butter and granulated sugar until light and fluffy.
3. Add the eggs one at a time, mixing well after each addition.
4. Sift the flour and matcha green tea powder together, then gradually add this dry mixture to the wet ingredients. Mix until just combined.
5. Pour the batter into the prepared molds, filling each about two-thirds full.
6. Bake for approximately 20 minutes or until a toothpick inserted into the center comes out clean.
7. Allow the cupcakes to cool completely on a wire rack.
8. Once cooled, top each cupcake with whipped cream frosting using a whipped cream dispenser for that perfect swirl.
9. For an extra special presentation, sprinkle a little more matcha on top and garnish with edible flowers.
10. Finally, present your delightful creations in decorative cupcake boxes to impress your loved one.
Enjoy this baking adventure together and celebrate your love with these unique and delicious Valentine's cupcakes!
Bring the campfire vibes indoors with these delightful S'mores Cupcakes, a nostalgic treat that will undoubtedly spark joy in your hearts.
These cupcakes combine the rich flavor of chocolate with the gooey sweetness of marshmallow fluff, all topped off with a crunchy graham cracker crust and a drizzle of chocolate ganache. Perfect for sharing on a cozy date night, these cupcakes will remind you of summer nights spent by the fire, making them a fun and interactive dessert to make together.
Ingredients:
- For the Chocolate Cupcakes: - 1 cup all-purpose flour - 1 cup granulated sugar - 1/2 cup cocoa powder - 2 large eggs - 1/2 cup milk - 1/2 cup vegetable oil - 1 teaspoon baking powder - 1/2 teaspoon salt - 1 teaspoon vanilla extract
- For the Filling: - 1 cup marshmallow fluff
- For the Graham Cracker Crust: - 1 cup crushed graham crackers - 1/4 cup melted butter - 2 tablespoons sugar
- For the Chocolate Ganache: - 1/2 cup heavy cream - 1 cup chocolate chips
Instructions:
1. Preheat your oven to 350°F (175°C) and line your cupcake tins with liners.
2. In a large mixing bowl, combine the flour, sugar, cocoa powder, baking powder, and salt.
3. Add the eggs, milk, vegetable oil, and vanilla extract to the dry ingredients. Mix until the batter is smooth and well combined.
4. Fill each cupcake liner about 2/3 full with the batter. Bake in the preheated oven for 20 minutes, or until a toothpick inserted in the center comes out clean. Allow them to cool completely.
5. Once cooled, use a small knife or cupcake corer to remove the center of each cupcake, creating a small well. Fill each well with a generous dollop of marshmallow fluff.
6. For the graham cracker crust, mix the crushed graham crackers with melted butter and sugar until well combined. Top each filled cupcake with a spoonful of the graham cracker mixture.
7. To make the chocolate ganache, heat the heavy cream in a small saucepan until it just begins to simmer. Remove from heat and add the chocolate chips, stirring until smooth.
8. Drizzle the chocolate ganache over the tops of the cupcakes, allowing it to flow down the sides.
9. For an extra touch, use a kitchen torch to gently toast the marshmallow fluff until golden brown.
10. Serve these S'mores Cupcakes at room temperature and enjoy the sweet treat together!
These cupcakes are a delightful way to celebrate your love and create sweet memories together.
Brighten up your Valentine's Day celebration with these delightful Lemon Blueberry Cupcakes, which are packed with zesty flavors and sweet blueberries. These cheerful treats are perfect for sharing with your special someone, making them a wonderful addition to your romantic date night. The combination of tangy lemon and juicy blueberries creates a refreshing taste that is sure to impress.
To create these scrumptious cupcakes, you'll need a few simple ingredients. Follow the steps below for a sweet treat that captures the spirit of love.
Ingredients:
- 1 cup all-purpose flour - 1 cup granulated sugar - 1/2 cup unsalted butter, softened - 2 large eggs - Zest of 1 lemon - 1 cup fresh blueberries
1. Preheat your oven to 350°F (175°C) and line a cupcake pan with festive cupcake liners.
2. In a mixing bowl, cream together the softened butter and granulated sugar until light and fluffy.
3. Add the eggs one at a time, mixing well after each addition.
4. Stir in the lemon zest, followed by the flour. Mix until just combined.
5. Gently fold in the fresh blueberries, being careful not to break them.
6. Spoon the batter into the prepared cupcake liners, filling each about 2/3 full.
7. Bake for 18-20 minutes, or until a toothpick inserted into the center comes out clean.
8. While the cupcakes are baking, prepare the buttercream frosting. In a bowl, beat the softened butter until creamy, then gradually add the powdered sugar, mixing until smooth.
9. Add the milk and vanilla extract, mixing until well combined and fluffy. Adjust the consistency with more milk if needed.
10. Once the cupcakes are completely cooled, frost them generously with the buttercream.
11. For an extra touch, sprinkle some lemon zest on top for garnish.
These bright and uplifting cupcakes are sure to enhance your baking experience with your loved one! Enjoy making and sharing these delightful Valentine’s cupcakes together.
10. Peanut Butter Cupcakes with Chocolate Frosting
10. Peanut Butter Cupcakes with Chocolate Frosting
Indulge in the ultimate flavor combination with these scrumptious Peanut Butter Cupcakes, generously topped with rich chocolate frosting. The delightful pairing of peanut butter and chocolate makes these cupcakes a perfect treat for any sweet tooth. Whether you're celebrating Valentine’s Day or simply enjoying a cozy night in, these easy recipes are sure to impress your special someone.
Get ready to whip up these delicious cupcakes with the following ingredients:
Ingredients:
- 1 cup all-purpose flour - 1 cup granulated sugar - 1/2 cup peanut butter - 2 large eggs - 1/2 cup milk
For the frosting: - 1 cup chocolate frosting (store-bought or homemade)
Instructions:
1. Preheat your oven to 350°F (175°C) and line a cupcake pan with silicone cupcake liners or paper liners.
2. In a large mixing bowl, combine the flour, sugar, peanut butter, eggs, and milk. Mix until the batter is smooth and well-combined.
3. Pour the batter evenly into the prepared cupcake liners, filling each about two-thirds full.
4. Bake in the preheated oven for approximately 20 minutes, or until a toothpick inserted into the center comes out clean.
5. Once baked, allow the cupcakes to cool completely in the pan before transferring them to a wire rack.
6. Once the cupcakes are cool, generously frost each one with chocolate frosting.
7. For a beautiful presentation, place the frosted cupcakes in decorative cupcake boxes.
These delightful treats are not only easy to make but also a wonderful way to share love and sweetness with someone special. Enjoy these Valentine's cupcakes as a lovely treat for date night!
Cherry Almond Cupcakes are the perfect sweet treat for Valentine’s Day. With their delightful combination of juicy cherries and nutty almond flavor, these cupcakes are sure to impress. They’re not only easy to make but also look beautiful when presented on a decorative cake stand. Whether you're baking together or surprising your loved one, these cupcakes will add a special touch to your date night.
Ingredients:
- 1 cup all-purpose flour - 1 cup granulated sugar - 1/2 cup unsalted butter, softened - 2 large eggs - 1/2 cup almond milk - 1 cup chopped fresh cherries - 1/2 teaspoon baking powder - 1/4 teaspoon salt
1. Preheat your oven to 350°F (175°C) and line a muffin tin with cupcake liners.
2. In a large mixing bowl, cream together the softened butter and sugar until light and fluffy.
3. Add the eggs one at a time, mixing well after each addition.
4. Stir in the almond milk until fully combined.
5. In a separate bowl, whisk together the flour, baking powder, and salt. Gradually add this dry mixture to the wet ingredients, mixing until just combined.
6. Gently fold in the chopped fresh cherries, ensuring they are evenly distributed throughout the batter.
7. Divide the batter evenly among the cupcake liners, filling each about two-thirds full.
8. Bake in the preheated oven for about 20 minutes, or until a toothpick inserted into the center comes out clean.
9. While the cupcakes are baking, prepare the almond frosting. In a medium bowl, beat the softened butter until creamy. Gradually add the powdered sugar, alternating with the almond milk, and mix until smooth. Finally, incorporate the almond extract.
10. Once the cupcakes have cooled completely, use a frosting spatula to generously spread the almond frosting on top.
11. Present your beautiful Cherry Almond Cupcakes on a decorative cake stand for a lovely finish.
These Valentine's cupcakes not only taste amazing but also bring a burst of color to your celebration. Enjoy baking and savoring these sweet treats together!
12. Vanilla Bean Cupcakes with Strawberry Frosting
Indulge in the sweet romance of baking with these Vanilla Bean Cupcakes, perfectly topped with a velvety strawberry frosting. These charming treats are not only easy to make but also bring a touch of elegance to your Valentine's celebrations. The delightful combination of rich vanilla and fresh strawberries will surely impress your loved ones, making it a delightful endeavor for your next date night.
Get ready to whip up these scrumptious cupcakes with the following ingredients and step-by-step guide.
Ingredients:
*For the Cupcakes:*
- 1 cup all-purpose flour - 1 cup granulated sugar - 1/2 cup unsalted butter, softened - 2 large eggs - Seeds from 1 vanilla bean - 1 teaspoon baking powder - 1/4 teaspoon salt - 1/2 cup milk
1. Preheat your oven to 350°F (175°C) and line a cupcake pan with paper liners.
2. In a mixing bowl, cream together the softened butter and granulated sugar until light and fluffy.
3. Add the eggs one at a time, mixing well after each addition, then incorporate the vanilla bean seeds.
4. In a separate bowl, whisk together the flour, baking powder, and salt.
5. Gradually add the dry ingredients to the creamed mixture, alternating with the milk, and mix until just combined.
6. Divide the batter evenly among the cupcake liners, filling each about two-thirds full.
7. Bake for 18-20 minutes, or until a toothpick inserted into the center comes out clean. Let them cool completely on a wire rack.
8. For the frosting, beat the softened butter until creamy, then gradually add the powdered sugar and mix until smooth.
9. Stir in the pureed strawberries and vanilla extract, mixing until fully combined.
10. Once the cupcakes are completely cooled, use a decorative piping bag to frost each cupcake with the strawberry frosting.
11. Optionally, garnish with fresh strawberry slices for an extra touch of elegance.
12. Package your beautiful creations in cupcake boxes to share or enjoy them yourself.
These Vanilla Bean Cupcakes with Strawberry Frosting are not just easy recipes; they are sweet treats made with love, perfect for celebrating Valentine's Day together. Enjoy the process and savor every bite!
Baking together is a beautiful way to bond, and these 12 easy Valentine's cupcake recipes offer the perfect opportunity to create delicious memories.
Whether you choose classic flavors or adventurous combinations, each cupcake brings a unique touch of love and sweetness to your celebration.
So gather your ingredients, preheat the oven, and enjoy a fun-filled baking date night with your special someone!
Note: We aim to provide accurate product links, but some may occasionally expire or become unavailable. If this happens, please search directly on Amazon for the product or a suitable alternative.
This post contains Amazon affiliate links, meaning I may earn a small commission if you purchase through my links, at no extra cost to you.